Led Control using Blynk
Controlling an LED using BLYNK App on NODEMCU
In this project we will learn how to control LED using Blynk App on Nodemcu.
Prerequisites: 1. Arduino IDE / 2. Blynk App
Step 1: Setting up Arduino IDE for Nodemcu
- Go to File and the preferences in the Arduino IDE:

- Preferences tab will open, in the Additional Boards Manage URLs paste the given link: http://arduino.esp8266.com/stable/package_esp8266com_index.json


- Go to Tools>Boards>Boards Manager, in the search bar, search esp8266 and install the board


- After installing the board, go to Tools>Boards and Select the board as NodeMCU 1.0:


Step 2: Installing the Blynk Library:
- Go to Sketch>Include Library>Manage Library


- In the manage libraries search bar, search Blynk, and install the library


Step 3: Setting up the Blynk App:
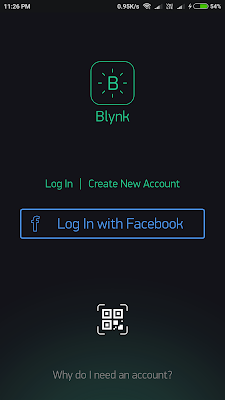
- Open the Blynk app and you will get screen like this:
- Now go for creating a new account, or just login if you have one. After logging in you will get a page like this:

- Now click on New Project and then give project name, the board which you are using (in our case it is Nodemcu), and the mode which is used to connect to the internet (here it is Wi-Fi), and then create on Create:

- Now your project is created and an Authentication key will be generated and sent to your registered mail id, the Authenciation Key can be found in projects settings too:

- Now we have to deploy a button that will control the LED on the Nodemcu. So first create on + icon on the project page:

- Now from the Widget Box select the Button (of 200 Envergy):

- Give the name, button no (D0 for the inbuilt LED), and change the type as Switch:

- Now it will look something like this:


Step 4: The Code:
/* Comment this out to disable prints and save space */
// You should get Auth Token in the Blynk App.
// Go to the Project Settings (nut icon).
char auth[] = "YourAuthToken";
// Your WiFi credentials.
// Set password to "" for open networks.
char ssid[] = "YourNetworkName";
char pass[] = "YourPassword";
void setup()
{
// Debug console
Serial.begin(9600);
Blynk.begin(auth, ssid, pass);
// You can also specify server:
//Blynk.begin(auth, ssid, pass, "blynk-cloud.com", 80);
//Blynk.begin(auth, ssid, pass, IPAddress(192,168,1,100), 8080);
}
void loop()
{
Blynk.run();
// You can inject your own code or combine it with other sketches.
// Check other examples on how to communicate with Blynk. Remember
// to avoid delay() function!
}
Note: After compiling and Uploading of the Code:
Go to the Blynk app and run the project you just made.
Push the button to turn the LED on or OFF.
When is the weather station post going to come???
ReplyDeleteProduct is ready and is deployed at the fields, once the proper documentations are done, it will be published here.
Delete